A dishwasher that won’t stop running can be a frustrating and concerning issue for homeowners. Not only does it waste water and energy, but it can also potentially damage the dishwasher if left unresolved. It’s important to address this problem promptly to avoid further complications and expenses.
Table of Contents
- Key Takeaways
- Safety Precautions Before You Start
- Tools Needed for Diagnosing Control Issues
- Common Causes of a Dishwasher That Won’t Stop Running
- Checking the Dishwasher Control Panel for Issues
- Testing the Dishwasher Timer for Malfunctions
- Inspecting the Dishwasher Float Switch for Problems
- Examining the Dishwasher Water Inlet Valve for Faults
- Checking the Dishwasher Drain Pump for Blockages
- Diagnosing Faulty Dishwasher Door Latches
- Troubleshooting Dishwasher Electrical Wiring Issues
- Fixing a Dishwasher That Won’t Stop Running: Step-by-Step Guide
- How to Run Diagnostic Mode on Major Dishwasher Brands
- How to Test Dishwasher Components with a Multimeter
- Testing the Float Switch
- Testing the Water Inlet Valve
- Testing the Door Latch Switch
- Testing the Timer or Control Board Relay
- Brand-Specific Notes: How This Issue Differs by Manufacturer
- Whirlpool
- GE
- Samsung
- LG
- Bosch
- Preventing Your Dishwasher from Running Nonstop
- When to Call a Professional for Dishwasher Repair
- What are the common control issues that may cause a dishwasher to keep running, and what tools are essential for troubleshooting and fixing these issues?
- FAQs
- What are the common control issues that cause a dishwasher to keep running?
- How can I diagnose the control issue causing my dishwasher to keep running?
- What are some DIY fixes for a dishwasher that won’t stop running?
- When should I call a professional to fix my dishwasher?
- How can I prevent control issues from occurring in my dishwasher?
- Related Dishwasher Repair Guides
When a dishwasher won’t stop running, it means that it continues to run even after the cycle has completed or when it is turned off. This can be caused by various factors, including issues with the control panel, timer, float switch, water inlet valve, drain pump, door latch, or electrical wiring. In order to fix the problem, it is crucial to identify the root cause first.
Key Takeaways
- A dishwasher that won’t stop running is a common problem that can be caused by various issues.
- Common causes include control panel issues, timer malfunctions, float switch problems, water inlet valve faults, drain pump blockages, faulty door latches, and electrical wiring issues.
- Checking the control panel, testing the timer, inspecting the float switch, examining the water inlet valve, checking the drain pump, diagnosing faulty door latches, and troubleshooting electrical wiring issues are all important steps in fixing a dishwasher that won’t stop running.
- A step-by-step guide can help you diagnose and fix the problem, but it’s important to consult a professional if you’re not comfortable working with electrical components.
- Regular maintenance and cleaning can help prevent dishwasher issues and prolong the life of your appliance.
Safety Precautions Before You Start
Working on a dishwasher involves both electrical and water systems, so safety must come first. Always disconnect power at the circuit breaker before opening any panels or touching internal components. Simply turning off the dishwasher with its power button is not enough, because the control board remains energized. Shut off the water supply valve under the sink as well to prevent accidental flooding while you work. If you need to test a component with power applied, such as checking voltage at the water inlet valve, use only one hand and keep the other away from metal surfaces. Never work on a dishwasher that is wet or standing in water. If you smell burning plastic or see scorch marks on any component, stop immediately and do not restore power until the damaged part is replaced.
Tools Needed for Diagnosing Control Issues
Having the right tools on hand makes diagnosis faster and safer. Gather these items before you begin:
- Digital multimeter: Essential for testing continuity on timers, float switches, water inlet valves, and door latch switches. A basic multimeter that reads ohms and AC voltage is sufficient.
- Nut driver set: Most dishwasher panels and kick plates are held in place by 1/4-inch or 5/16-inch hex screws. A magnetic nut driver saves time and prevents dropped screws.
- Phillips and flathead screwdrivers: Needed for accessing control panels, removing dispenser assemblies, and adjusting door latches.
- Needle-nose pliers: Useful for gripping small components, removing wire connectors, and pulling debris from pump impellers.
- Towels and a shallow pan: Place these under the dishwasher before disconnecting water lines or removing the drain pump to catch residual water.
- Flashlight or headlamp: Dishwasher interiors and under-counter spaces are poorly lit, and good visibility helps you spot damaged wires and debris.
- Your model and serial number: Write this down before you start. You will need it to look up correct replacement parts, wiring diagrams, and diagnostic mode entry sequences for your specific model.
Common Causes of a Dishwasher That Won’t Stop Running
There are several common causes of a dishwasher that won’t stop running. One possible cause is a malfunctioning control panel. The control panel is responsible for receiving and executing commands from the user. If there is a problem with the control panel, it may not be able to register the command to stop the dishwasher.
Another common cause is a faulty timer. The timer controls the duration of each cycle in the dishwasher. If the timer malfunctions, it may not send the signal to stop the dishwasher once the cycle is complete.
The float switch is another component that can cause a dishwasher to keep running. The float switch is responsible for monitoring the water level in the dishwasher. If it gets stuck or fails to function properly, it may not send the signal to stop the dishwasher when it reaches the desired water level.
Certain brands are more prone to specific failures than others. Whirlpool and KitchenAid dishwashers, which share many internal components, frequently experience electronic control board failures that cause the unit to keep cycling. Bosch dishwashers, with their European-designed water management systems, often develop water inlet valve issues that allow a slow, continuous fill. Older GE models with mechanical timers are particularly susceptible to timer motor burnout, where the timer stalls mid-cycle and the dishwasher never advances to the drain and stop phase.
San Diego homeowners should also consider local water conditions. The city’s hard water leaves mineral deposits that can build up on float switches, valve seats, and pump impellers over time, accelerating wear on these components. A dishwasher that ran fine for years may suddenly start sticking in a cycle as scale accumulation reaches a tipping point. Most of these repairs fall in the $150 to $350 range for parts and labor when handled by a professional, though a DIY-savvy homeowner can often replace a float switch or water inlet valve for under $80 in parts.
Checking the Dishwasher Control Panel for Issues
To check the dishwasher control panel for issues, start by turning off the power supply to the dishwasher. Remove any screws or fasteners holding the control panel in place and carefully detach it from the dishwasher door.
Inspect the control panel for any visible signs of damage, such as loose wires or burnt components. Check the buttons and switches for any signs of wear or malfunction. If you notice any issues, such as loose connections or damaged components, it may be necessary to replace the control panel.
On Whirlpool and KitchenAid models, the touchpad and the electronic control board are often separate components, which means you need to determine which one has failed before ordering parts. A telltale sign of a touchpad failure is when certain buttons stop responding while others still work, or when the dishwasher starts a cycle on its own without any button being pressed. A control board failure, on the other hand, often presents as random cycling, lights flashing in patterns, or the dishwasher ignoring all inputs entirely. Replacement touchpads typically cost $80 to $150, while control boards range from $150 to $300 depending on the model.
Bosch dishwashers use a more integrated control module design, and the control panel is part of the door assembly on many models. If you own a Bosch and notice that the display flickers or buttons require multiple presses to register, the control module may be failing. Because Bosch control modules are more complex and expensive to replace, often running $200 to $400 for the part alone, this is one repair where calling a professional typically makes more sense than attempting it yourself. A technician can also run diagnostic mode on Bosch models to confirm whether the module is truly defective before you spend money on a replacement.
Testing the Dishwasher Timer for Malfunctions
To test the dishwasher timer for malfunctions, start by turning off the power supply to the dishwasher. Locate the timer, which is usually located behind the control panel or inside the dishwasher door.
Using a multimeter, set it to the ohms setting and touch the probes to the terminals on the timer. If the multimeter shows a reading of zero or infinity, it indicates a faulty timer that needs to be replaced.
Older GE and Kenmore dishwashers with mechanical rotary timers are the most common models to experience timer failures. You can often hear a mechanical timer motor humming or clicking as it advances through the cycle. If the humming stops and the dishwasher stalls at one point in the cycle, the timer motor has likely burned out. A replacement mechanical timer typically costs $60 to $120, making this one of the more affordable DIY repairs. However, you must match the exact part number to your model, as timer cam configurations vary even within the same brand.
On newer electronic models from Whirlpool, KitchenAid, and Bosch, the traditional mechanical timer has been replaced by the electronic control board, which handles all cycle timing digitally. If your dishwasher has a digital display and no visible rotary dial, the control board is your timer. In these cases, a stuck cycle usually points to a failed relay on the control board rather than a separate timer component. Warning signs include the cycle time display freezing at a specific number, the dishwasher repeating the same cycle phase, or a burning smell coming from the control panel area. Professional repair for control board replacement in San Diego typically runs $250 to $450 including parts and labor.
Inspecting the Dishwasher Float Switch for Problems
To inspect the dishwasher float switch for problems, start by turning off the power supply to the dishwasher. Locate the float switch, which is usually located at the bottom of the dishwasher tub.
Check if the float switch moves freely up and down. If it is stuck in one position or does not move at all, it may need to be cleaned or replaced. Additionally, check for any signs of damage or corrosion on the float switch. If there are any visible issues, it is recommended to replace the float switch.
In Bosch dishwashers, the float switch is located beneath the tub and is accessible by removing the lower kick plate. Bosch float switches are known to accumulate debris from food soil that bypasses the filter, causing the switch to stick in the open position and allowing the dishwasher to keep filling. A thorough cleaning of the float assembly with warm water and a soft brush often resolves the issue without needing a replacement part. If cleaning does not fix the problem, a replacement Bosch float switch costs approximately $25 to $50.
On Whirlpool and KitchenAid models, the float switch sits inside a plastic housing at the front left corner of the tub floor. A common warning sign is water pooling at the bottom of the dishwasher even when no cycle is running, which indicates the float is stuck in the down position and the dishwasher thinks it needs more water. If you hear a continuous humming sound from the water inlet valve while the dishwasher is supposedly off, shut off the water supply immediately to prevent flooding. This is a straightforward DIY fix for most homeowners, but if you notice corrosion on the wiring connector, a professional should handle the repair to avoid electrical hazards.
Examining the Dishwasher Water Inlet Valve for Faults
To examine the dishwasher water inlet valve for faults, start by turning off the power supply and water supply to the dishwasher. Locate the water inlet valve, which is usually located at the bottom of the dishwasher near where the water supply line connects.
Inspect the water inlet valve for any signs of damage or leaks. Check if it opens and closes properly when activated. If there are any visible issues or if it fails to open and close properly, it may be necessary to replace the water inlet valve.
San Diego’s hard water is a major contributor to water inlet valve failures. Mineral deposits build up on the valve seat over time, preventing the valve from closing completely. This allows water to trickle into the dishwasher continuously, which can cause the unit to keep running as it tries to manage the unexpected water. If you notice water in the bottom of your dishwasher when it has been off for hours, the inlet valve is likely leaking through. A replacement water inlet valve costs $30 to $70 for most Whirlpool, GE, and KitchenAid models, and the swap takes about 30 minutes with basic tools.
Bosch dishwashers use a dual-coil inlet valve design that is more sensitive to sediment and scale buildup. If you own a Bosch and hear a faint clicking or buzzing sound from the lower left side of the machine even when no cycle is running, one of the valve coils may be stuck open. Before replacing the valve, check the inlet screen at the water connection for blockages, as a clogged screen can mimic valve failure symptoms. A Bosch replacement inlet valve runs $40 to $90. If your dishwasher is also not cleaning dishes properly alongside the running issue, the inlet valve may not be allowing enough water in during the wash phase, and you can learn more about that related problem in our guide to a dishwasher not cleaning well.
Checking the Dishwasher Drain Pump for Blockages
To check the dishwasher drain pump for blockages, start by turning off the power supply to the dishwasher. Locate the drain pump, which is usually located at the bottom of the dishwasher near the back.
Inspect the drain pump for any debris or blockages that may be preventing it from functioning properly. Clear any obstructions and ensure that the impeller can spin freely. If the drain pump is damaged or if it fails to function properly even after clearing any blockages, it may need to be replaced.
A failing drain pump can cause a dishwasher to keep running because the control board detects that water has not fully drained and repeatedly triggers the drain cycle. Warning signs include a gurgling or grinding noise during the drain phase, water remaining in the bottom of the tub after a cycle completes, or the dishwasher pausing and restarting the drain cycle multiple times. Food debris, broken glass fragments, and hard water scale are the most common culprits. For a detailed walkthrough of clearing drain blockages, see our guide on unclogging a dishwasher drain. A replacement drain pump costs $40 to $90 for most brands, and the repair is manageable for a confident DIYer.
GE and Whirlpool dishwashers use separate drain pumps that are relatively easy to access from the front by removing the lower kick plate. Bosch models, however, combine the drain pump and circulation pump in a more integrated assembly that requires more disassembly to reach. If you own a Bosch and the drain pump is making a loud humming noise but not moving water, the pump motor may have seized. Bosch replacement drain pumps run $50 to $120. In San Diego, professional drain pump replacement including parts and labor typically costs $180 to $300, so if you are comfortable with basic tool work, the DIY route can save you a meaningful amount.
Diagnosing Faulty Dishwasher Door Latches
To diagnose faulty dishwasher door latches, start by turning off the power supply to the dishwasher. Locate the door latch, which is usually located on the top or side of the dishwasher door.
Check if the door latch is properly aligned and securely fastened. If it is loose or misaligned, it may not be able to engage properly and signal the dishwasher to stop running. Adjust or tighten the door latch as necessary. If the door latch is damaged or worn out, it may need to be replaced.
A faulty door latch can cause a dishwasher to keep running because the control board never receives the signal that the cycle is complete and the door is ready to be opened. On KitchenAid and Whirlpool models, the door latch includes a built-in switch that tells the control board when the door is closed. If this switch fails, the dishwasher may continue cycling indefinitely. Warning signs include the dishwasher starting even when the door is slightly ajar, the cycle not pausing when you open the door mid-cycle, or a loose feeling when you close the door. A replacement door latch assembly costs $25 to $60 for most brands.
Bosch dishwashers use a more complex latch mechanism with a double-lock design that can fail at the microswitch level rather than the mechanical latch itself. If you own a Bosch and the door closes firmly but the dishwasher still behaves as if the door is open, the microswitch inside the latch assembly is likely the problem. This repair is more involved because the switch is integrated into the latch housing. A Bosch replacement latch assembly runs $40 to $80. For most homeowners, this is a manageable DIY repair, but if the door has become visibly misaligned with the frame, the hinges may need adjustment first, which is better left to a professional.
Troubleshooting Dishwasher Electrical Wiring Issues
To troubleshoot dishwasher electrical wiring issues, start by turning off the power supply to the dishwasher. Inspect the electrical wiring for any visible signs of damage, such as frayed wires or loose connections.
Check if all wires are securely connected and if there are any loose or disconnected wires. If you notice any issues with the electrical wiring, it is recommended to seek professional help from a licensed electrician to avoid any safety hazards.
Electrical wiring problems are among the most dangerous dishwasher issues to diagnose because they can involve both the low-voltage control wiring inside the dishwasher and the 120-volt power supply feeding the unit. A common symptom of a wiring fault is intermittent behavior, where the dishwasher runs normally for a few cycles and then suddenly keeps running or stops mid-cycle. This often points to a loose wire nut connection or a corroded terminal on the control board. Rodent damage to wiring is also a real possibility in garages and under-counter installations, particularly in older San Diego homes where dishwashers are installed near exterior walls.
If you discover burnt or melted wire connectors, do not attempt a temporary repair with electrical tape. These connections carry enough current to start a fire, and a proper repair requires crimp connectors or replacement of the entire wire harness. GE and Whirlpool wire harnesses are available as replacement parts for $30 to $80, but identifying the correct harness requires your exact model number. Because electrical faults can be difficult to trace and carry genuine safety risks, this is one area where calling a professional is almost always the right call. A licensed appliance technician in San Diego can diagnose and repair wiring issues for $150 to $300, and the peace of mind is worth the cost when dealing with potential fire hazards.
Fixing a Dishwasher That Won’t Stop Running: Step-by-Step Guide
1. Turn off the power supply and water supply to the dishwasher.
2. Inspect the control panel for any visible signs of damage or malfunction.
3. Test the dishwasher timer using a multimeter to check for malfunctions.
4. Inspect the float switch for any issues, such as being stuck or damaged.
5. Examine the water inlet valve for any faults, such as leaks or failure to open and close properly.
6. Check the drain pump for any blockages or damage.
7. Diagnose the door latch for any misalignment or damage.
8. Troubleshoot the dishwasher’s electrical wiring for any issues.
9. Follow the manufacturer’s instructions to replace any faulty components.
10. Restore power and water supply to the dishwasher and test if it stops running properly.
How to Run Diagnostic Mode on Major Dishwasher Brands
Most modern dishwashers have a built-in diagnostic mode that cycles through each component in sequence, making it easier to pinpoint which part has failed. The entry sequence varies by brand, so you need your model number to look up the exact procedure. Here are the common entry methods for major brands:
Whirlpool and KitchenAid: Press the following button sequence in order within five seconds: Heated Dry, Normal, Heated Dry, Normal. The dishwasher will enter a test cycle that runs through fill, wash, drain, and dry functions. Watch for error codes on the display or blinking light patterns. A pattern of blinking lights can be decoded using your service manual to identify the specific fault.
Bosch: Bosch diagnostic mode entry varies by model series. On many models, hold the Start button and the Power button simultaneously for three to five seconds. On others, press and hold the two top cycle buttons. The display will show error codes such as E01 through E30, each corresponding to a specific fault. Error code E15, for example, indicates a water leak detected by the float switch, while E24 points to a drain problem. Write down any codes before clearing them, because they will help a technician diagnose the issue if you end up calling for service.
GE: GE dishwashers typically enter diagnostic mode by pressing Start and then pressing Start again within five seconds, or by pressing and holding the Select Cycle and Start buttons together. The dishwasher will run through a self-test and display error codes on the front panel. GE error codes begin with a letter followed by numbers, such as C1 through C8 for various cycle faults.
LG and Samsung: LG dishwashers often enter diagnostic mode by pressing and holding the Power and Rinse buttons simultaneously. Samsung models typically use a sequence of pressing Delay Start, Power, Delay Start within a few seconds. Both brands display alphanumeric error codes that correspond to specific component failures. If you are unsure how to interpret the codes, a professional technician can decode them quickly and recommend the correct repair.
Running diagnostic mode before calling for dishwasher repair in San Diego can save time and money. When you can tell a technician exactly which error code appeared, they can arrive with the likely replacement part already on the truck, reducing the chance of a second visit. If your dishwasher does not have a diagnostic mode or the test cycle does not reveal the problem, the issue may require hands-on component testing with a multimeter. For more help with related dishwasher problems, see our guides on a dishwasher not cleaning properly or a dishwasher not draining. You can also learn more about our same-day appliance repair services in San Diego if you decide the repair is beyond your comfort level.
How to Test Dishwasher Components with a Multimeter
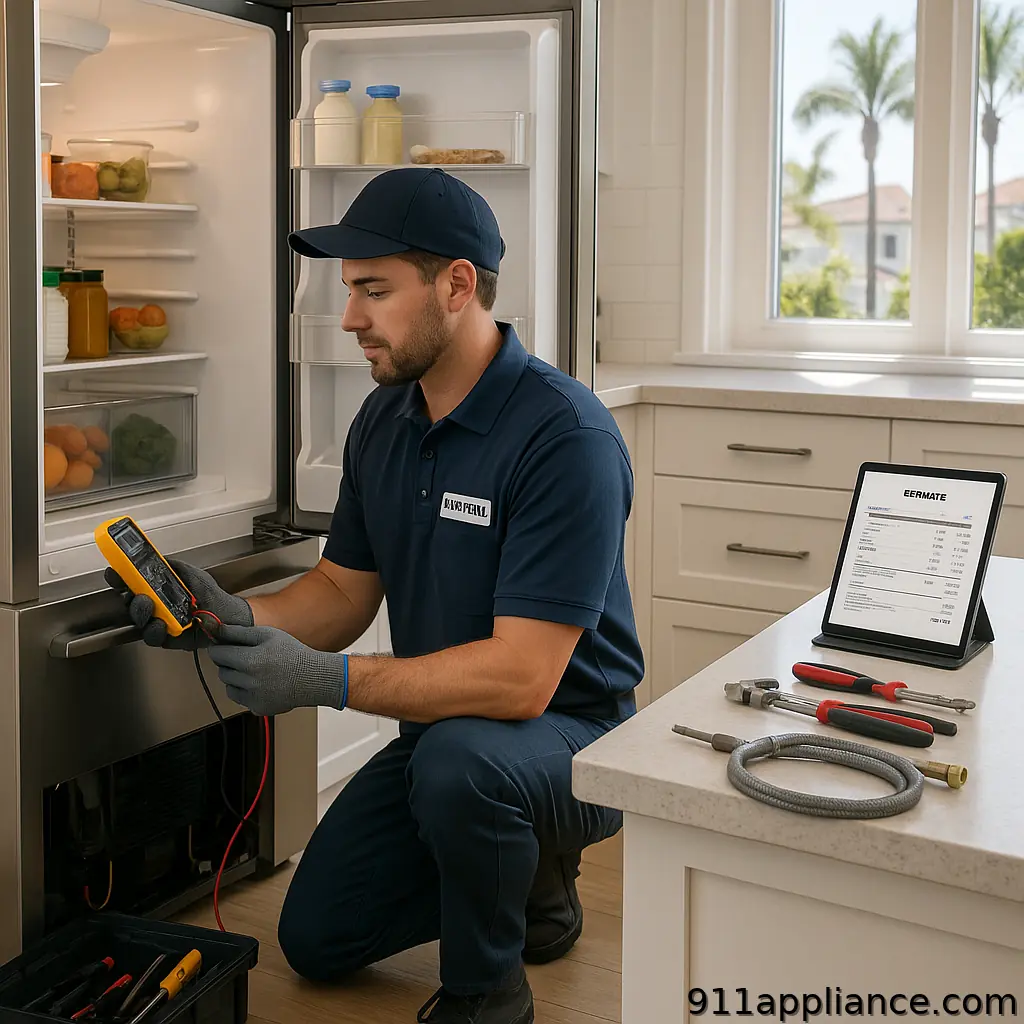
A multimeter is the single most useful tool for narrowing down why a dishwasher will not stop running, because most of the suspect components are electrical switches and valves that either pass or fail a continuity test. Once you have disconnected power at the breaker and shut off the water supply, you can test each part in sequence. Always set your multimeter to the ohms (resistance) setting and touch the probes together first to confirm the meter reads near zero, which tells you the leads and battery are working. If you are new to this tool, our dishwasher troubleshooting tools guide explains multimeter basics in more detail.
Testing the Float Switch
Remove the lower kick plate and locate the float switch beneath the tub. Disconnect the two wires from the switch terminals. Touch one probe to each terminal. A healthy float switch reads near zero ohms (closed) when the float is down and infinity (open) when you lift the float. If the reading never changes as you move the float up and down, the switch is stuck or burned out and needs replacing. On Whirlpool and KitchenAid models, also check the plastic float stem for scale buildup that can physically jam the float before you conclude the switch itself is bad.
Testing the Water Inlet Valve
Locate the valve where the water supply line meets the dishwasher. Disconnect the two wire leads. Touch one probe to each terminal. A functioning solenoid coil typically reads between 500 and 1,500 ohms. A reading of infinity means the coil is open and the valve will never open, while a reading near zero means the coil is shorted and the valve may stick open, which is exactly what causes a slow continuous fill that keeps the dishwasher running. Replace the valve in either case.
Testing the Door Latch Switch
Remove the inner door panel to access the latch assembly. Disconnect the wires and test the switch the same way as the float switch. The switch should show continuity (near zero ohms) when the latch is in the closed position and open (infinity) when the latch is released. If the reading stays the same in both positions, the microswitch inside the latch has failed.
Testing the Timer or Control Board Relay
On mechanical timer models, test between the timer motor terminals for continuity. No reading means the timer motor has burned out. On electronic models, you cannot easily test the control board relays with a multimeter, so rely on diagnostic mode error codes and the process of elimination. If every other component tests good but the dishwasher still runs continuously, the control board is the likely culprit.
Brand-Specific Notes: How This Issue Differs by Manufacturer
While the underlying components are similar across brands, each manufacturer’s design choices change which failure is most likely and how the symptom shows up. Here is what to watch for with the most common dishwasher brands in San Diego homes.
Whirlpool
Whirlpool and its KitchenAid sibling share control boards and float switch designs. The most frequent cause of a Whirlpool that keeps running is a stuck relay on the electronic control board, which often shows up as the cycle time display freezing or the unit restarting the wash phase on its own. Whirlpool float switches also collect hard water scale on the float stem, so clean the stem before you replace the switch. Entry to diagnostic mode is the Heated Dry, Normal, Heated Dry, Normal sequence.
GE
GE splits into two camps. Older GE models with mechanical rotary timers stall when the timer motor burns out, and you can often hear the hum stop mid cycle. Newer GE models with electronic controls more often fail at the water inlet valve, where sediment holds the valve open and the tub slowly fills even while the dishwasher is off. GE diagnostic mode uses Start, then Start again within five seconds.
Samsung
Samsung dishwashers lean on soil sensors and turbidity readings to decide cycle length. When that sensor fouls with food film or hard water scale, the control board keeps extending the wash phase because it never reads the water as clean. Samsung units also use a combined drain and circulation pump assembly, so a single pump fault can cause both poor draining and continuous running. Watch for error codes that start with a letter followed by numbers.
LG
LG dishwashers commonly run on when the inlet valve leaks through, a problem that hard water accelerates. LG also uses a control board mounted in the door that is sensitive to moisture intrusion from a worn door seal, and a damp board can trigger random cycling. If your LG keeps running and the door area feels humid, check the door gasket before condemning the control board.
Bosch
Bosch uses a dual coil inlet valve and a double lock door latch with a microswitch. A stuck inlet valve coil produces a faint buzz from the lower left side while the unit is off, and a failed latch microswitch makes the dishwasher behave as if the door is always open. Bosch diagnostic codes run E01 through E30, and writing down the code before you clear it helps any technician arrive with the right part.
If you are not sure which brand specific failure you are dealing with, a technician from 911 Appliance Repair can decode the error code and test the right component on the first visit. We also offer dishwasher repair in San Diego for every brand listed above, with same-day service in most cases.
Preventing Your Dishwasher from Running Nonstop
Most dishwasher run-on problems stem from a small set of wear items that you can protect with routine care. Clean the filter at the bottom of the tub every two to four weeks, because food debris that bypasses a clogged filter ends up jamming the float switch and drain pump. Inspect the float assembly monthly and wipe away any mineral scale, which is especially important in San Diego where hard water accelerates buildup on moving parts.
Run a dishwasher cleaner or a cup of white vinegar in an empty hot cycle every month to dissolve scale inside the water inlet valve, spray arms, and pump housing. This single habit prevents the slow valve leaks that cause a dishwasher to keep filling and running. Check that your home water heater is set to at least 120 degrees Fahrenheit, because water that is too cool forces the control board to extend cycles longer than normal.
Avoid using more detergent than the manufacturer recommends, because excess suds can confuse the soil sensor and trigger repeated rinse cycles that never seem to end. Keep the door latch and strike plate clean and aligned, and replace the latch if the door ever feels loose when closed. If your dishwasher is also leaving spots on glassware, the rinse aid system may be part of the problem, and our guide to a dishwasher not dispensing rinse aid walks through that fix. For Bosch owners dealing with wet dishes alongside the running issue, see our Bosch dishwasher drying troubleshooting guide. Finally, if your dishwasher is more than eight years old and has already needed one control board or valve replacement, budget for the likelihood that other wear parts are nearing the end of their service life, and weigh future repair costs against the price of a new energy efficient model.
In conclusion, a dishwasher that won’t stop running can be a frustrating problem, but it is important to address it promptly to avoid water wastage and potential damage to the dishwasher. By following the steps outlined in this article, homeowners can identify and fix the root cause of the problem, whether it is an issue with the control panel, timer, float switch, water inlet valve, drain pump, door latch, or electrical wiring. It is crucial to follow the instructions carefully and seek professional help if necessary to ensure a safe and effective repair.
Before starting any diagnostic work, gather the right tools to make the job safer and more efficient. Having the proper dishwasher troubleshooting equipment, including a multimeter, nut driver set, and needle-nose pliers, will let you test components accurately rather than guessing. Keep your model number handy, as you will need it to look up correct replacement parts and wiring diagrams. Most manufacturers post service manuals online that show the specific location and testing procedure for each component in your model.
Cost is often the deciding factor between DIY and professional repair. If you can identify the problem and the part costs under $80, a DIY replacement usually makes sense. However, if the diagnosis is uncertain or the part costs over $200, the risk of installing the wrong component or causing additional damage increases. A professional service call in San Diego typically includes diagnosis, and if you proceed with the repair, the diagnostic fee is usually applied toward the total. Factor in the value of your time as well, as a repair that takes you an entire weekend may take a technician under an hour.
If you’re dealing with a dishwasher that won’t stop running, you’ll want to check out this helpful article on 911 Appliance’s blog. “Diagnosing and Fixing Control Issues” provides expert advice on troubleshooting and resolving control problems in dishwashers. Whether it’s a faulty control panel or a malfunctioning timer, this article will guide you through the steps to identify and fix the issue. Don’t let a running dishwasher drive you crazy – click here to read the full article and get your dishwasher back in working order.
When to Call a Professional for Dishwasher Repair
While many dishwasher running issues can be diagnosed and fixed by a handy homeowner, certain situations clearly call for professional help. If you have tested the float switch, water inlet valve, and door latch and the dishwasher still will not stop running, the problem likely involves the control board or wiring harness, both of which require specialized diagnostic equipment and experience to repair safely. Burning smells, visible scorch marks on components, or a circuit breaker that trips repeatedly when the dishwasher runs are all signs of a serious electrical fault that should not be tackled without proper training. Additionally, if your dishwasher is under warranty, attempting your own repair will almost certainly void that coverage, making a professional service call the financially smart choice.
In San Diego, professional dishwasher repair typically costs between $150 and $400 depending on the part that needs replacement and the brand of your dishwasher. Luxury brands like Bosch and KitchenAid tend to be at the higher end of that range due to more expensive parts and more complex assemblies. At 911 Appliance Repair, we have been serving San Diego families since 1991 with same-day service, upfront pricing, and a one-year warranty on all parts and labor. Our $49.95 service call fee is waived when you proceed with the repair, so you only pay for the diagnostic if you choose not to fix the problem. With over 557 reviews and an A+ BBB rating, we have earned the trust of homeowners across San Diego County.
If your dishwasher will not stop running and you are ready for expert help, our team can diagnose and fix the problem the same day in most cases. We service all major brands including Whirlpool, Bosch, GE, KitchenAid, LG, Samsung, and more. Schedule your professional dishwasher repair today by calling 800-929-1192 or booking online, and let our experienced technicians get your dishwasher back to normal before you face another wasted cycle.
What are the common control issues that may cause a dishwasher to keep running, and what tools are essential for troubleshooting and fixing these issues?
Common control issues that can cause a dishwasher to keep running include a faulty water inlet valve or a malfunctioning timer or control board. Essential dishwasher troubleshooting tools include a multimeter for testing electrical components and a screwdriver set for accessing the internal components of the dishwasher.
FAQs
What are the common control issues that cause a dishwasher to keep running?
Some common control issues that cause a dishwasher to keep running include a faulty timer, a malfunctioning float switch, a broken door latch, or a defective control board.
How can I diagnose the control issue causing my dishwasher to keep running?
To diagnose the control issue causing your dishwasher to keep running, you can check the timer, float switch, door latch, and control board for any signs of damage or malfunction. You can also use a multimeter to test the continuity of these components.
What are some DIY fixes for a dishwasher that won’t stop running?
Some DIY fixes for a dishwasher that won’t stop running include cleaning the float switch, replacing the door latch, resetting the control board, or replacing the timer. However, it’s important to note that some control issues may require professional repair.
When should I call a professional to fix my dishwasher?
You should call a professional to fix your dishwasher if you’re unsure about the cause of the control issue, if you don’t have the necessary tools or expertise to make the repair, or if the DIY fixes don’t solve the problem. Additionally, if your dishwasher is still under warranty, it’s best to have a professional handle the repair to avoid voiding the warranty.
How can I prevent control issues from occurring in my dishwasher?
To prevent control issues from occurring in your dishwasher, you should regularly clean and maintain the dishwasher, avoid overloading it, use the appropriate detergent and rinse aid, and avoid slamming the door shut. Additionally, it’s important to address any issues as soon as they arise to prevent further damage. Furthermore, engaging in a systematic diagnosing of dishwashers can help identify underlying problems before they escalate into more significant issues. Regularly checking for clogs or blockages can also enhance the overall efficiency of the appliance. By staying proactive, you can ensure a longer lifespan for your dishwasher and optimize its performance.