Unplug the appliance and identify the issue. Follow the manufacturer’s guidelines for troubleshooting and replacing parts.
Table of Contents
- Safety First: Preparing For Appliance Repair
- Disconnecting Power
- Personal Protective Equipment
- Workspace Preparation
- Identifying The Problem
- Understanding Appliance Symptoms
- Using The Appliance’s Diagnostic Features
- Gathering The Right Tools
- Must-have Tools For Appliance Repair
- Specialized Equipment For Specific Repairs
- Locating Appliance Model And Parts Information
- Finding The Model Number
- Sourcing Replacement Parts
- Common Appliance Issues And Fixes
- Troubleshooting Power Cable Issues
- Cleaning Filters And Removing Blockages
- Resetting Appliances
- Step-by-step Repair Guides
- Fixing A Faulty Dishwasher
- Repairing An Electric Dryer
- Unjamming A Garbage Disposal
- When To Call A Professional
- Assessing Repair Complexity
- Weighing Cost Of Diy Vs. Professional Repair
- Maintenance Tips To Avoid Future Repairs
- Regular Cleaning And Care
- Preventive Measures For Appliance Longevity
- Learning Resources For Diy Repair
- Online Repair Videos And Tutorials
- Appliance Repair Programs And Courses
- Concluding The Repair
- Testing The Appliance Post-repair
- Proper Disposal Of Old Parts
- Frequently Asked Questions
- What Should Be Done When Some Appliances Fail To Work?
- How To Troubleshoot Kitchen Appliances?
- What Should You Do Before Fixing An Electrical Appliance?
- What Do You Call Someone Who Repairs Home Appliances?
- Conclusion
Repairing appliances can be a cost-effective and satisfying task. First, ensure the appliance is unplugged to avoid electrical hazards. Identify the issue by consulting the user manual or online resources. Basic problems often involve faulty power cables, clogged filters, or blocked drains.
Use appropriate tools and replacement parts specifically designed for the appliance. If the issue persists, consider seeking professional help. Safety is crucial, so always wear personal protective equipment and work in a well-lit, organized space. Learning to repair appliances not only saves money but also extends the lifespan of your household items, making it a valuable skill to master.
Safety First: Preparing For Appliance Repair
Repairing appliances at home can save time and money. It’s essential to prioritize safety before starting any repair. Follow these simple steps to ensure a safe repair process.
Disconnecting Power
Always disconnect the power before starting any repair. Unplug the appliance from the wall socket. If the appliance is hardwired, switch off the circuit breaker. This step prevents electric shock.
- Unplug from the wall socket
- Switch off the circuit breaker
- Double-check the power is off
Ensure there’s no chance of accidental power restoration while you work.
Personal Protective Equipment
Wear personal protective equipment (PPE) to stay safe. Use gloves to protect your hands from sharp edges. Safety glasses shield your eyes from debris. Wear a mask if dealing with dust or fumes.
| Equipment | Purpose |
|---|---|
| Gloves | Protect hands from sharp edges |
| Safety Glasses | Shield eyes from debris |
| Mask | Guard against dust or fumes |
Workspace Preparation
Prepare your workspace to ensure a smooth repair process. Clear the area around the appliance. Lay down a mat to catch any small parts. Organize your tools for easy access.
- Clear the area around the appliance
- Lay down a mat to catch small parts
- Organize tools for easy access
A clean and organized workspace prevents accidents and lost parts. Proper preparation makes the repair process faster and safer.

Identifying The Problem
Before diving into appliance repair, it’s crucial to identify the problem. Understanding the issue helps in finding the right solution. This guide will help you pinpoint the problem with your appliance.
Understanding Appliance Symptoms
Appliances often show specific symptoms when something is wrong. Recognizing these symptoms can save time and effort.
- Unusual Noises: Grinding, clicking, or buzzing sounds.
- Performance Issues: Inconsistent heating, cooling, or functioning.
- Visible Damage: Broken parts, leaks, or burned-out components.
Observing these symptoms closely can narrow down the potential issues. Use this information to understand what might be wrong.
Using The Appliance’s Diagnostic Features
Modern appliances come with diagnostic features. These tools can help identify problems quickly.
- Check the user manual for diagnostic instructions.
- Use the appliance’s built-in diagnostics to find error codes.
- Consult the manual or manufacturer’s website to understand these codes.
Most appliances have a display panel that shows error codes. These codes indicate specific issues. Understanding these codes can simplify the repair process.
| Appliance | Common Error Codes | Meaning |
|---|---|---|
| Washing Machine | E01, E02 | Door lock issues, Water not filling |
| Refrigerator | F1, F2 | Temperature sensor fault, Compressor issues |
| Dishwasher | E24, E25 | Drain issues, Pump problems |
Using these diagnostic features can provide a clear direction for your repair efforts. It helps in quickly addressing the root cause of the problem.
Gathering The Right Tools
Repairing appliances can save money and extend the life of your devices. But before you start, gathering the right tools is crucial. Having the correct tools makes the job easier and ensures safety and efficiency.
Must-have Tools For Appliance Repair
Every DIY appliance repair toolkit should contain some essential tools. These tools are versatile and useful for various repairs. Among the most important items to include are screwdrivers, pliers, and a multimeter, which can help troubleshoot electrical issues. For those new to fixing things, investing in a set of appliance repair tools for beginners can make the process much smoother and more manageable. Having the right tools on hand not only boosts confidence but also enhances the quality of repairs you can perform.
- Screwdrivers: Both flathead and Phillips screwdrivers are necessary. They help you open panels and remove screws.
- Pliers: Needle-nose and slip-joint pliers are essential. They are great for gripping, twisting, and cutting wires.
- Multimeter: A multimeter tests electrical current, voltage, and resistance. This tool is crucial for diagnosing electrical issues.
- Wrenches: An adjustable wrench and a set of socket wrenches are useful. They help loosen and tighten nuts and bolts.
- Flashlight: A good flashlight illuminates dark areas inside appliances. It helps you see what you are working on.
Specialized Equipment For Specific Repairs
Some appliance repairs require specialized tools. These tools are designed for specific functions and make certain repairs easier.
| Appliance | Specialized Tool | Purpose |
|---|---|---|
| Refrigerator | Fin Comb | Straightens condenser and evaporator coils |
| Washing Machine | Spanner Wrench | Removes and tightens tub nut |
| Dishwasher | Torx Screwdriver | Removes specialized screws |
| Microwave | Capacitor Discharge Tool | Safely discharges stored electrical energy |
Having these tools on hand can make specific repairs quicker and safer. They are worth the investment for anyone serious about DIY appliance repair.
Locating Appliance Model And Parts Information
Identifying the right parts for your appliance repair can be challenging. Knowing your appliance’s model number is crucial. This ensures you source the correct replacement parts. In this section, we will explore how to find your appliance model number and where to source replacement parts.
Finding The Model Number
The model number is a unique identifier for your appliance. It helps you find the right parts. Here are some common places to look for the model number:
- Inside the Door: Many appliances have the model number inside the door. This includes washers, dryers, and dishwashers.
- Back of the Appliance: Check the back panel for a sticker or plate with the model number.
- Under the Lid: For top-loading machines, the model number might be under the lid or on the rim.
- Owner’s Manual: Your appliance’s manual often lists the model number.
Once you find the model number, write it down. Keep it handy for when you need to order parts.
Sourcing Replacement Parts
After you have the model number, you can start sourcing replacement parts. Here are some ways to find them:
- Manufacturer’s Website: Visit the appliance manufacturer’s website. Use your model number to search for parts.
- Local Appliance Stores: Many local stores carry a range of appliance parts. Bring your model number for accurate assistance.
- Online Parts Retailers: Websites like PartsSelect and RepairClinic offer a wide selection of parts. Enter your model number to find compatible parts.
- Second-Hand Shops: For older appliances, second-hand shops or salvage yards might have the parts you need.
To ensure the parts fit and function properly, always double-check the model number before purchasing.
Common Appliance Issues And Fixes
Appliances can sometimes break down or not work properly. Many problems are easy to fix. Below are common issues and how to fix them.
Troubleshooting Power Cable Issues
A faulty power cable can cause an appliance to stop working. Check the cable for any visible damage. Follow these steps:
- Unplug the appliance.
- Inspect the cable for cuts or exposed wires.
- If damaged, replace the cable with a new one.
- Plug the appliance back in and test it.
Cleaning Filters And Removing Blockages
Dirty filters and blockages can make appliances less efficient. Cleaning them can solve many problems. Here’s how:
- Turn off and unplug the appliance.
- Locate the filter and remove it.
- Clean the filter with warm water and soap.
- Dry the filter completely before putting it back.
- Check for any blockages in the appliance’s vents or hoses.
Resetting Appliances
Sometimes an appliance needs to be reset to work again. This is often the case for modern appliances. Follow these steps:
- Unplug the appliance from the power source.
- Wait for at least 5 minutes.
- Plug the appliance back in.
- Look for a reset button and press it if available.
These simple steps can fix many common appliance problems. Always remember to stay safe and unplug appliances before working on them.

Step-by-step Repair Guides
Fixing appliances at home saves money and extends their life. Follow these step-by-step repair guides to handle common appliance problems effectively. Each guide is simple, easy to understand, and designed for DIY enthusiasts. By taking on repairs yourself, you not only gain valuable skills but also enjoy a sense of accomplishment when fixing issues. However, for more complex problems, considering professional assistance can be beneficial. Exploring the ‘lg appliance repair service benefits’ can help you make informed decisions when repairs seem too daunting to tackle alone.
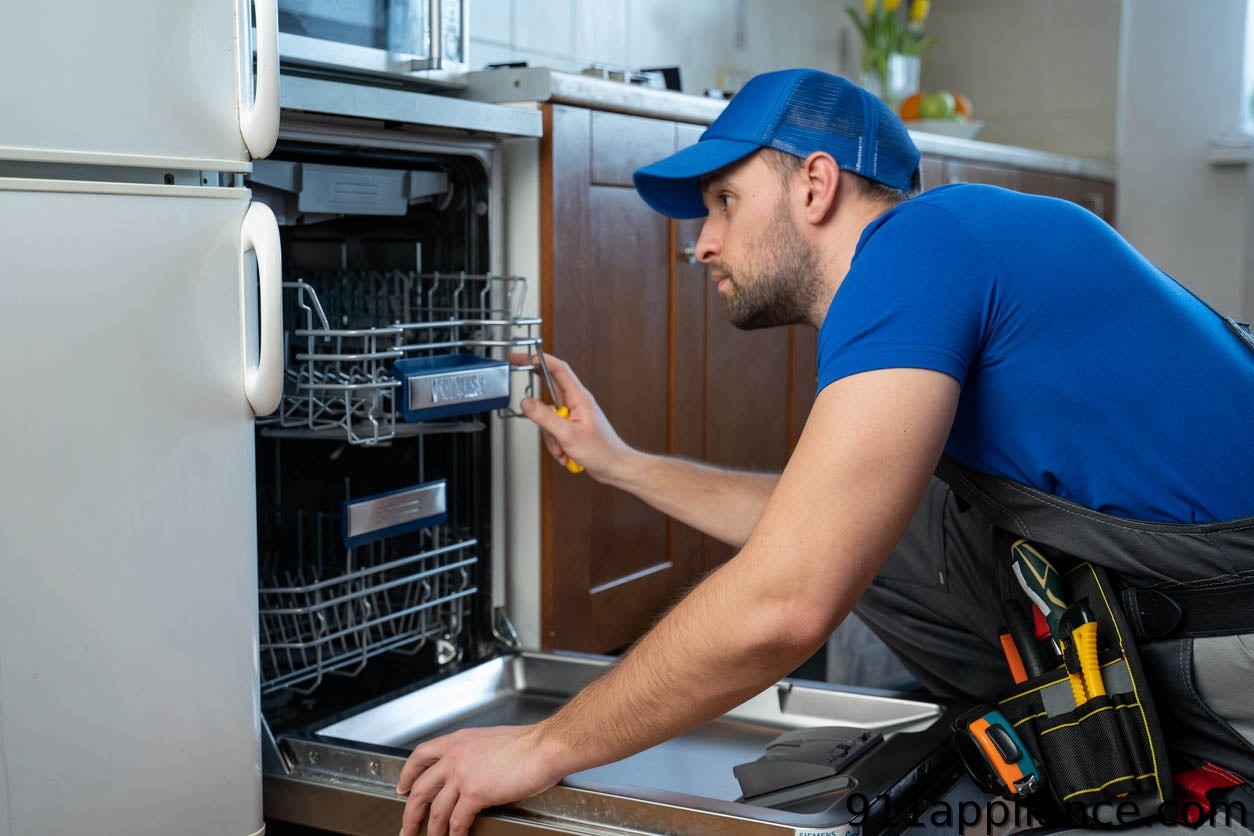
Fixing A Faulty Dishwasher
A faulty dishwasher can be a major inconvenience. Here’s a step-by-step guide to get it back in working order:
- Check the power supply: Ensure the dishwasher is plugged in and the circuit breaker is not tripped.
- Inspect the door latch: Make sure the door latch is secure. If it’s broken, replace it.
- Clean the filters: Remove and clean the filters to ensure there are no blockages.
- Check the spray arms: Ensure they are not clogged and can rotate freely.
- Run a test cycle: After completing these steps, run a test cycle to see if the issue is resolved.
Repairing An Electric Dryer
An electric dryer that isn’t working can be frustrating. Follow these steps to fix it:
- Check the power cord: Make sure the dryer is properly plugged in and the outlet is working.
- Inspect the lint filter: Clean the lint filter to improve airflow and efficiency.
- Test the thermal fuse: Use a multimeter to check if the thermal fuse is blown. Replace it if necessary.
- Examine the drum belt: Ensure the drum belt is intact and properly aligned.
- Run the dryer: Run the dryer to confirm that the problem is fixed.
Unjamming A Garbage Disposal
A jammed garbage disposal can be a hassle. Here’s how to unjam it:
- Turn off the power: Ensure the disposal is turned off and unplugged to avoid accidents.
- Use an Allen wrench: Insert an Allen wrench into the bottom of the disposal and turn it to free the jam.
- Check for blockages: Use a flashlight to look inside the disposal and remove any visible blockages.
- Reset the disposal: Press the reset button located at the bottom of the unit.
- Test the disposal: Turn the power back on and run the disposal to ensure it is working correctly.
By following these step-by-step repair guides, you can tackle common appliance issues with confidence. Remember to always prioritize safety and consult the appliance manual if needed.
When To Call A Professional
Repairing appliances can save money and time. But not all repairs are simple. Sometimes, calling a professional is the best choice. Knowing when to make this call is crucial. Let’s explore key factors to consider.
Assessing Repair Complexity
Before starting a repair, assess its complexity. Some appliance repairs are simple, like replacing a filter or a fuse. These tasks require minimal tools and knowledge.
More complex repairs involve electrical components or intricate mechanical parts. Attempting these without expertise can be dangerous. For example, fixing a refrigerator compressor or a washing machine motor requires specialized skills. In such cases, calling a professional is wise.
Weighing Cost Of Diy Vs. Professional Repair
Cost is a major factor in deciding between DIY and professional repair. DIY repairs often seem cheaper. You only pay for parts and maybe some tools. But consider the hidden costs. If you make a mistake, it might cause more damage, leading to higher repair costs later.
Professional repairs come with a fee. However, professionals have the right tools and expertise. They can quickly diagnose and fix the problem, saving you time and hassle.
| Factors | DIY Repair | Professional Repair |
|---|---|---|
| Cost | Lower initial cost | Higher initial cost |
| Time | May take longer | Faster resolution |
| Complexity | Best for simple fixes | Handles complex issues |
| Risk | Higher risk of error | Lower risk of error |
Consider these factors to make an informed decision. Sometimes, saving a bit now can cost more in the long run.
Maintenance Tips To Avoid Future Repairs
Keeping your appliances in top-notch condition can save you time and money. Regular maintenance helps prevent major issues, ensuring your appliances last longer. Follow these tips to keep your household devices running smoothly and avoid costly repairs.
Regular Cleaning And Care
Regular cleaning is crucial for appliance longevity. Dust, grease, and grime can build up and cause malfunctions.
- Refrigerators: Clean the coils every six months. Use a vacuum or a brush.
- Washing Machines: Run a cleaning cycle with vinegar monthly. Wipe the door seals after each use.
- Ovens: Wipe spills immediately. Use a self-cleaning feature if available.
- Dishwashers: Remove food particles from the filter weekly. Run a cleaning cycle with vinegar monthly.
Preventive Measures For Appliance Longevity
Taking preventive steps can significantly extend the life of your appliances. Here are some easy-to-follow tips:
- Monitor and Replace Parts: Check for worn-out parts and replace them promptly. This includes belts in washers and seals in refrigerators.
- Use Appliances Properly: Avoid overloading your washer or dryer. Follow the manufacturer’s instructions for each appliance.
- Check Connections: Ensure all hoses and connections are tight and leak-free. Loose or damaged connections can cause major issues.
- Balance Loads: Make sure washing machines are properly balanced. An unbalanced load can cause damage over time.
By following these maintenance tips, you can keep your appliances running efficiently and avoid future repairs. Regular cleaning and preventive measures are key to appliance longevity.
Learning Resources For Diy Repair
Learning how to repair appliances yourself can be both rewarding and cost-saving. Understanding the right resources to get started is crucial. You can find a wealth of information online and through specialized programs. Here are some excellent learning resources for DIY appliance repair.
Online Repair Videos And Tutorials
Online repair videos and tutorials are an excellent starting point. Platforms like YouTube have countless videos that cover various appliance repairs. You can find detailed step-by-step guides to fix almost any appliance issue.
- Scott The Fix-It Guy: Offers comprehensive repair videos for different appliances.
- DIYHIPChicks: Provides exclusive DIY programs and step-by-step instructions.
- Bens Appliances and Junk: Shares tools and tips for effective appliance repairs.
These videos usually cover:
- Identifying the appliance model number.
- Diagnosing the issue.
- Step-by-step repair instructions.
- Tools required for the repair.
For visual learners, these videos are invaluable. They make complex repairs look simple and doable.
Appliance Repair Programs And Courses
If you prefer a more structured learning approach, appliance repair programs and courses are ideal. These programs provide in-depth knowledge and practical skills. Some popular options include:
| Program | Description |
|---|---|
| Sears Kenmore Appliance Repair Program | Comprehensive course covering Kenmore appliances. |
| Online Appliance Repair School | Offers certification and detailed repair training. |
| Community College Courses | Local courses with hands-on training and expert instructors. |
These programs often include:
- Detailed repair manuals.
- Hands-on practice sessions.
- Certification upon completion.
Taking a course can give you confidence and knowledge to handle more complex repairs.

Concluding The Repair
You’ve done the hard part. You’ve diagnosed the issue and replaced the faulty parts. Now it’s time to conclude the repair. This final step ensures your appliance works correctly and maintains safety.
Testing The Appliance Post-repair
Before you declare the repair a success, test the appliance. Follow these steps to ensure everything works:
- Plug in the appliance: Ensure it receives power.
- Turn it on: Check if it starts without issues.
- Run a full cycle: For appliances like washers or dryers, run a full cycle.
- Monitor for noises: Listen for any unusual sounds that indicate problems.
If everything works smoothly, the repair is successful. If not, revisit your steps to identify any missed issues.
Proper Disposal Of Old Parts
Proper disposal of old parts is essential. Here’s how you can do it responsibly:
- Separate recyclable parts: Identify parts that can be recycled.
- Contact local recycling centers: Find centers that accept appliance parts.
- Dispose of non-recyclable parts: Follow local regulations for disposing of non-recyclable materials.
Proper disposal helps keep the environment clean and safe. It also prevents hazardous materials from causing harm.
Frequently Asked Questions
What Should Be Done When Some Appliances Fail To Work?
First, check power connections and circuit breakers. If still faulty, consult the user manual. Contact a professional if needed.
How To Troubleshoot Kitchen Appliances?
Check power supply and cables. Clean filters regularly. Inspect for leaks. Test switches and buttons. Consult the manual. Seek professional help if needed.
What Should You Do Before Fixing An Electrical Appliance?
Unplug the appliance. Wear proper protective gear. Ensure the workspace is well-lit and organized. Reconnect ground wires. Use the right tools.
What Do You Call Someone Who Repairs Home Appliances?
A person who repairs home appliances is called an appliance repair technician.
Conclusion
Repairing appliances can be straightforward with the right knowledge. Always ensure safety first by disconnecting power. Follow these steps, and you can save time and money. Don’t hesitate to consult professionals for complex issues. Remember, regular maintenance can prevent future problems.
Happy fixing!

