Is Your Whirlpool Dryer Not Heating?
Table of Contents
- Electric Dryers: The Power of Resistance
- The Heating Element Itself
- Gas Dryers: The Flame of Efficiency
- The Most Common Objections: Lint and Blockages
- The Dryer Vent: The Lungs of Your Appliance
- The Lint Filter: The First Line of Defense
- Internal Ducts and the Blower Wheel
- Electrical Enigmas: When Power Fails to Produce Heat
- The Main Power Supply
- Thermostats and Safety Devices
- The Heating Element Itself
- Gas Dryer Diagnostics: When the Flame Refuses to Ignite
- Gas Supply Verification
- Ignition System Failures
- Blocked Burner Orifice
- Beyond the Obvious: Addressing Less Common Causes
- The Motor and Drive Belt
- Control Board Malfunctions
- Moisture Sensor Issues
- FAQs
- Why is my Whirlpool dryer not heating in 2025?
- How can I troubleshoot a Whirlpool dryer that is not heating?
- Is it safe to replace parts on my Whirlpool dryer myself?
- Can a clogged vent cause my Whirlpool dryer to stop heating?
- When should I call a professional for my Whirlpool dryer not heating?
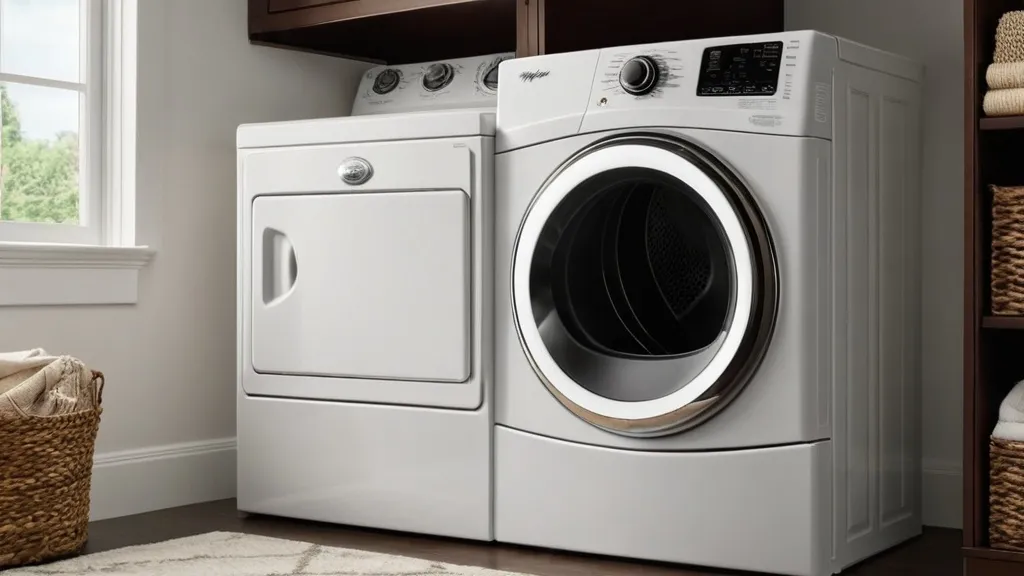
Your Whirlpool dryer, a tireless workhorse in the laundry room, has suddenly decided to stage a mutiny, refusing to emit its usual comforting warmth. This can be a frustrating predicament, disrupting your routine and leaving you with a pile of damp clothes. Fortunately, many of these heating issues can be diagnosed and, in some cases, resolved by you. This guide will lead you through the common culprits behind your Whirlpool dryer’s cool performance, empowering you to become a dryer detective and potentially save yourself a repair bill.
Before you dive into troubleshooting, it’s beneficial to grasp the fundamental principles of how your Whirlpool dryer generates heat. Unlike a simple fan that circulates air, a heating dryer involves a complex interplay of electrical components or a gas burner system to raise the air temperature. This heated air then flows through the drum, evaporating moisture from your clothes.
Electric Dryers: The Power of Resistance
Your electric Whirlpool dryer operates on the principle of electrical resistance. The primary component responsible for generating heat is the heating element, often a coiled wire made of a resistive material enclosed within a metal sheath. When electricity flows through this coil, its resistance causes it to heat up significantly. Think of it like a miniature toaster element, but on a grander scale and designed for continuous operation. This heated element then transfers its thermal energy to the air circulating around it, which is then propelled into the drying drum.
The Heating Element Itself
- The heating element is a consumable part, meaning it can wear out over time due to constant expansion and contraction cycles.
- When the element fails, it’s akin to a road with a broken bridge – the electrical current can no longer complete its journey, and thus, no heat is produced.
The High-Limit Thermostat
- This crucial safety device acts as a guardian, preventing the dryer from overheating. It automatically shuts off power to the heating element if temperatures exceed a safe threshold.
- If the high-limit thermostat fails, it can either remain open, cutting off power even when it’s safe to heat, or it might fail to open, leading to a safety shutdown even during normal operation.
The Cycling Thermostat
- This thermostat plays a role in regulating the drying temperature. It cycles the heating element on and off to maintain a desired temperature range within the drum.
- If the cycling thermostat malfunctions, it might not signal the heating element to turn on, or it might turn it off prematurely.
The Thermal Fuse
- Another safety component, the thermal fuse is a one-time device designed to blow and permanently disconnect power to the heating element in the event of a severe overheating situation that the high-limit thermostat failed to address.
- Once blown, it cannot be reset and must be replaced. It’s the ultimate emergency brake for your dryer’s heating system.
Gas Dryers: The Flame of Efficiency
If you have a gas Whirlpool dryer, the heating process involves a different set of components centered around a gas burner. This system offers a more energy-efficient way to generate heat compared to electric models, but it also introduces a unique set of potential failure points.
The Gas Valve Solenoid
- These are electrically controlled valves that regulate the flow of natural gas or propane to the burner.
- When energized, they open, allowing gas to flow. If these solenoids fail, the gas simply cannot reach the burner manifold.
The Igniter
- This component, often a ceramic rod, heats up to a high temperature when electricity is applied, igniting the gas precisely as it’s released by the valve.
- Think of it as the spark plug in your car’s engine, initiating the combustion process. If the igniter cracks or burns out, there’s no spark to light the gas.
The Flame Sensor
- This safety device monitors the presence of a flame. If the gas igniter lights the gas, the flame sensor detects the heat and signals the control board to keep the gas valve open.
- If the flame sensor doesn’t detect a flame (perhaps due to an incomplete ignition or a faulty sensor), it will shut off the gas supply to prevent the buildup of unburned gas.
The Burner Assembly
- This is where the gas mixes with air and ignites. The burner itself can become clogged with lint or debris, impeding proper combustion.
If you’re dealing with the frustration of a Whirlpool dryer not heating in 2025, you may find it helpful to explore related appliance issues, such as oven overheating. Understanding the common causes of appliance malfunctions can provide valuable insights into troubleshooting your dryer. For more information on this topic, check out the article on the top causes of oven overheating and how to fix them at this link.
The Most Common Objections: Lint and Blockages
Lint is the silent saboteur of your dryer’s efficiency, and it’s often the primary culprit when your Whirlpool dryer ceases to heat. Its omnipresent nature means you’ll encounter it in various forms throughout the dryer’s system.
The Dryer Vent: The Lungs of Your Appliance
The dryer vent is a critical pathway for air to exit your appliance and your home. When it becomes clogged with lint, it’s like trying to breathe through a blocked nose. Not only does this prevent hot, moist air from escaping, but it also restricts the flow of fresh air into the dryer, hindering the heating process.
Exterior Vent Hood
- The flap on the exterior of your house that allows air to escape can become stuck or obstructed by lint, leaves, or even bird nests.
- Periodically check this hood to ensure it opens freely when the dryer is running.
Flexible Venting Hose
- The hose that connects your dryer to the wall can be a notorious lint magnet. If it’s a flexible plastic accordion-style hose, it’s even more prone to kinking and trapping lint.
- It’s highly recommended to use rigid or semi-rigid metal venting for better airflow and reduced lint buildup.
The Transition to the Wall
- The point where the vent hose connects to the dryer and the wall is another common area for lint to accumulate.
The Lint Filter: The First Line of Defense
Your Whirlpool dryer’s lint filter is designed to capture the majority of lint shed by your clothes. However, if it’s not cleaned regularly, it becomes a dense mat, restricting airflow.
Cleaning the Filter
- This is the easiest maintenance task you can perform. Remove the filter, peel off the lint, and reinsert it. For a deeper clean, you can wash the filter with warm, soapy water and a soft brush to remove any fabric softener residue that might be clogging the mesh.
- A clogged lint filter is a simple problem with a simple solution, yet it’s often overlooked.
Internal Ducts and the Blower Wheel
Beyond the visible lint filter and exterior vent, lint can find its way into the internal ductwork of your dryer and even clog the blower wheel.
Clogged Blower Wheel
- The blower wheel is responsible for pushing air through the dryer. If it becomes packed with lint, its effectiveness is severely diminished, impacting both airflow and heat circulation.
- Accessing and cleaning the blower wheel can be more involved, often requiring partial disassembly of the dryer.
Electrical Enigmas: When Power Fails to Produce Heat
If you’ve ruled out lint blockages, the next suspect in your Whirlpool dryer’s lack of heat is an electrical issue. The intricate web of wires and components that deliver power to the heating element might have a break in its circuit.
The Main Power Supply
Before blaming the dryer itself, ensure it’s receiving adequate power.
Circuit Breaker or Fuse
- Your dryer, especially electric models, runs on a dedicated high-amperage circuit. Check your home’s electrical panel for a tripped breaker or a blown fuse.
- If the breaker consistently trips, it could indicate a deeper electrical problem with the dryer or your home’s wiring.
Power Cord
- Inspect the power cord for any signs of damage, fraying, or loose connections. A damaged cord can interrupt the flow of electricity.
Thermostats and Safety Devices
As mentioned earlier, various thermostats and safety fuses are designed to protect your dryer. A malfunction in any of these can prevent heating.
The Thermal Fuse (Revisited)
- This is a common failure point. If it blows, it’s like a fuse in your house – it needs to be replaced.
- Replacing a thermal fuse requires careful disassembly and reassembly.
The High-Limit Thermostat (Revisited)
- If this thermostat is faulty, it might be continuously signaling that the dryer is too hot, preventing the heating element from engaging.
- These are typically resettable in some models, but often a faulty one needs replacement.
The Cycling Thermostat (Revisited)
- A malfunctioning cycling thermostat can prevent the heating element from turning on at all or cause it to cycle off too quickly.
- Diagnosing a faulty thermostat often involves testing with a multimeter.
The Heating Element Itself
The heating element is the engine of your dryer’s heat generation. If it fails, there’s no heat.
Continuity Testing
- Using a multimeter, you can test the heating element for continuity. If there is no continuity, it means the element is broken internally and needs replacement.
- This is a common and relatively straightforward replacement part if you’re comfortable with basic appliance repair.
Gas Dryer Diagnostics: When the Flame Refuses to Ignite

For gas Whirlpool dryers, the absence of heat often points to an issue with the gas ignition system or gas supply.
Gas Supply Verification
The most basic check is to ensure your dryer is receiving gas.
Propane Tank Level (for Propane Dryers)
- If you use propane, ensure your tank is not empty. It sounds simple, but it’s an easy oversight.
Gas Shut-off Valve
- Confirm that the gas shut-off valve for the dryer (usually located behind the unit) is fully open.
Ignition System Failures
This is where gas dryers can get a bit more complex, involving a sequence of events to create and maintain a flame.
The Igniter’s Spark
- The igniter must glow red-hot to ignite the gas. If it doesn’t glow, or only glows dimly, it’s likely faulty.
- Cracked or burned-out igniters are common.
Gas Valve Solenoids
- These electrically operated valves control the flow of gas. If they fail, the gas won’t reach the burner.
- Testing these requires electrical knowledge and often a multimeter.
The Flame Sensor’s Vigilance
- If the igniter works but there’s no flame, or the flame sensor is faulty, it will shut off the gas.
- This sensor ensures the burner is actually lit before allowing continuous gas flow.
Blocked Burner Orifice
Even if gas is supplied and the igniter fires, a clogged burner can prevent proper ignition.
Cleaning the Burner
- Over time, lint and debris can accumulate around the burner orifice, obstructing gas flow.
- This usually requires careful cleaning with a small brush or needle.
If you are feeling frustrated because your Whirlpool dryer is not heating in 2025, you might find it helpful to explore some expert advice on appliance repair. A related article discusses the best places to buy appliance repair services, which can guide you in finding reliable help for your dryer issues. For more information, check out this insightful resource on appliance repair options that could save you time and money.
Beyond the Obvious: Addressing Less Common Causes
| Issue | Possible Cause | Estimated Fix Time | Difficulty Level | Common Solutions |
|---|---|---|---|---|
| Dryer Not Heating | Faulty Heating Element | 30-60 minutes | Medium | Replace heating element |
| Dryer Not Heating | Tripped Thermal Fuse | 15-30 minutes | Easy | Replace thermal fuse |
| Dryer Not Heating | Defective Thermostat | 30-45 minutes | Medium | Replace thermostat |
| Dryer Not Heating | Power Supply Issues | 10-20 minutes | Easy | Check circuit breaker and power cord |
| Dryer Not Heating | Clogged Vent | 20-40 minutes | Easy | Clean dryer vent and ducts |
| Dryer Not Heating | Malfunctioning Timer or Control Board | 45-90 minutes | Hard | Replace timer or control board |
While lint and electrical components are the biggest suspects, other factors can sometimes contribute to a dryer that’s not heating effectively.
The Motor and Drive Belt
While not directly responsible for generating heat, the motor and drive belt play a crucial role in the overall operation.
Motor Failure
- If the motor is failing, it might not be able to spin the drum at the correct speed, or it might not be able to power the fan that circulates air.
Broken Drive Belt
- A broken drive belt will prevent the drum from turning, and consequently, the fan may not operate correctly, impacting airflow and heat distribution.
Control Board Malfunctions
The control board is the brain of your Whirlpool dryer, dictating the operation of all its components.
Circuit Board Issues
- A faulty control board can send incorrect signals to the heating element, thermostats, or gas valve, leading to a lack of heat.
- These are generally more complex to diagnose and repair, often requiring professional intervention.
Moisture Sensor Issues
Some Whirlpool dryers feature moisture sensors that help regulate drying time. While not a direct cause of no heat, a malfunctioning sensor could theoretically misinterpret the dryness of clothes, leading to premature cycle termination, giving the impression of no heat.
Sensor Cleaning
- Ensure the two metallic strips of the moisture sensor (usually located inside the drum) are clean and free of any residue from fabric softener or dryer sheets.
By systematically working through these potential issues, you can often pinpoint the reason why your Whirlpool dryer has stopped heating. Remember to always disconnect power to the appliance before any internal inspection or repair. If you’re uncomfortable with any of these steps, or if the problem persists, seeking the assistance of a qualified appliance repair technician is always the wisest course of action.
FAQs
Why is my Whirlpool dryer not heating in 2025?
Common reasons include a faulty heating element, a blown thermal fuse, a malfunctioning thermostat, or issues with the power supply. Regular maintenance and checking these components can help identify the problem.
How can I troubleshoot a Whirlpool dryer that is not heating?
Start by unplugging the dryer and inspecting the heating element for continuity using a multimeter. Check the thermal fuse and thermostat for damage or failure. Also, ensure the dryer is receiving proper electrical power and that the vent is not clogged.
Is it safe to replace parts on my Whirlpool dryer myself?
While some parts like the lint filter or vent can be cleaned safely, replacing internal components such as the heating element or thermal fuse should be done with caution. Always unplug the dryer before attempting repairs, and consult the user manual or a professional technician if unsure.
Can a clogged vent cause my Whirlpool dryer to stop heating?
Yes, a clogged or restricted vent can cause the dryer to overheat and trigger safety features that prevent heating. Regularly cleaning the vent and lint trap helps maintain proper airflow and efficient heating.
When should I call a professional for my Whirlpool dryer not heating?
If basic troubleshooting does not resolve the issue, or if you are uncomfortable performing electrical tests and repairs, it is advisable to contact a certified appliance repair technician to diagnose and fix the problem safely.
